How to use the nICE editor
In many areas of our CMS, we try to provide the power needed to build out your site with functions and features powerful enough to drive your business online. However, we know that our day to day customers need it to be simple to manage as well. When it is as simple as changing the text on buttons or links, or updating page content, no one wants to go playing around in the HTML and risk breaking layouts. Thankfully we have a feature called the nICE editor, which makes these edits a breeze.
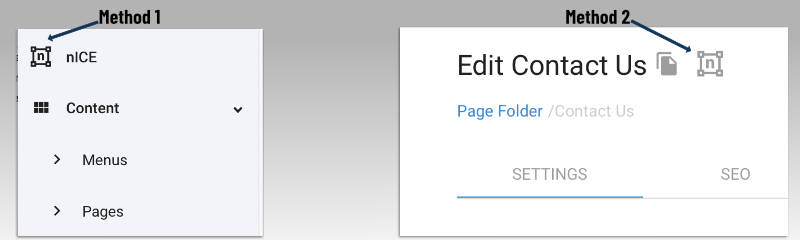
Available in all hosting plans, this feature provides in-context editing across the site. It truly is "nice" to use, pun intended. The name is an acronym for Nice In Context Editor. Using it couldn't be simpler. There are two ways to access it.
The first method is by simply clicking the nICE link at the top of the admin menu. It will launch a new browser and load, by default, the home page of your website. You can tell you are working within the editor because the footer of the page will show a bar with two buttons. "Save" and "Exit Nice". With the editor active, you can click on text anywhere on the page and easily edit directly from the front end. This includes titles, page content, and even labels for buttons. Once you are done with any edits, click the save button at the bottom to apply.
In this mode, it can be difficult to move around to other pages in the site as the dropdown on menus, for example, are disabled. However, if you launch and other link in to the browser, it will load in edit mode for you. That is, until you choose to "exit Nice" at the bottom. Clicking that will get you back to normal mode.
Since this can be a bit cumbersome to navigate, there is a second method to engage the editor directly on the page you would like to work on. When you are in the admin, simply navigate to that page by going to Content > Pages> and then find the page. It may be listed directly or you may need to drill down in to a folder first and then click the page. This varies for each site based on the page structure.
Once you are on that page and you see the editing form, you will have an option on the top of the page. At the very top your page will read: "Edit "pagename" followed by two icons. The first allows you to duplicate the page. The second one you will recognize at the nICE editor icon. A square with squares in the corners.
Clicking this icon while on any page will load THAT page in to the browser in a new window. You will recognize that the editor is active for you as the footer bar is visible again. Simply click anywhere on the page, notice the cursor in the text, and conduct your edits. Editing and saving function the same as described in the first method. Be sure to hit save and if you have no other pages to edit, click "Exit Nice".
While the admin provides powerful features for managing your pages including making edits, sometimes it is best to work from the front end where you can immediately see it in the final layout. Other times, you need to do more than just edit text such as inserting dynamic content in to a page. For that, the admin interface and toolbox are certainly the best.
Hopefully this better understanding of the nICE editor gives you the comfort and control you need to choose what works best for you and your team.